

DOP-Care x Building Sony fx3
Step-by-Step Guide to Setting Up the Ultimate Sony FX3 Rig
At DOP-Care, we specialize in more than just camera rental services—we offer fully customized setups designed specifically for Directors of Photography. If you’re aiming to replicate the high-caliber setup outlined below, you can rent all the necessary equipment directly from us, ensuring you’re fully equipped for your next project.
Follow us on Instagram for the latest updates and behind-the-scenes content: https://www.instagram.com/dopcarehyderabad/
Introduction
Setting up a professional camera rig can be a game-changer for your filmmaking experience. In this guide, we’ll walk you through the step-by-step process we used to equip our Sony FX3 with top-tier accessories, ensuring you get the most out of your gear. Let’s dive into each component and how it fits into the overall setup.
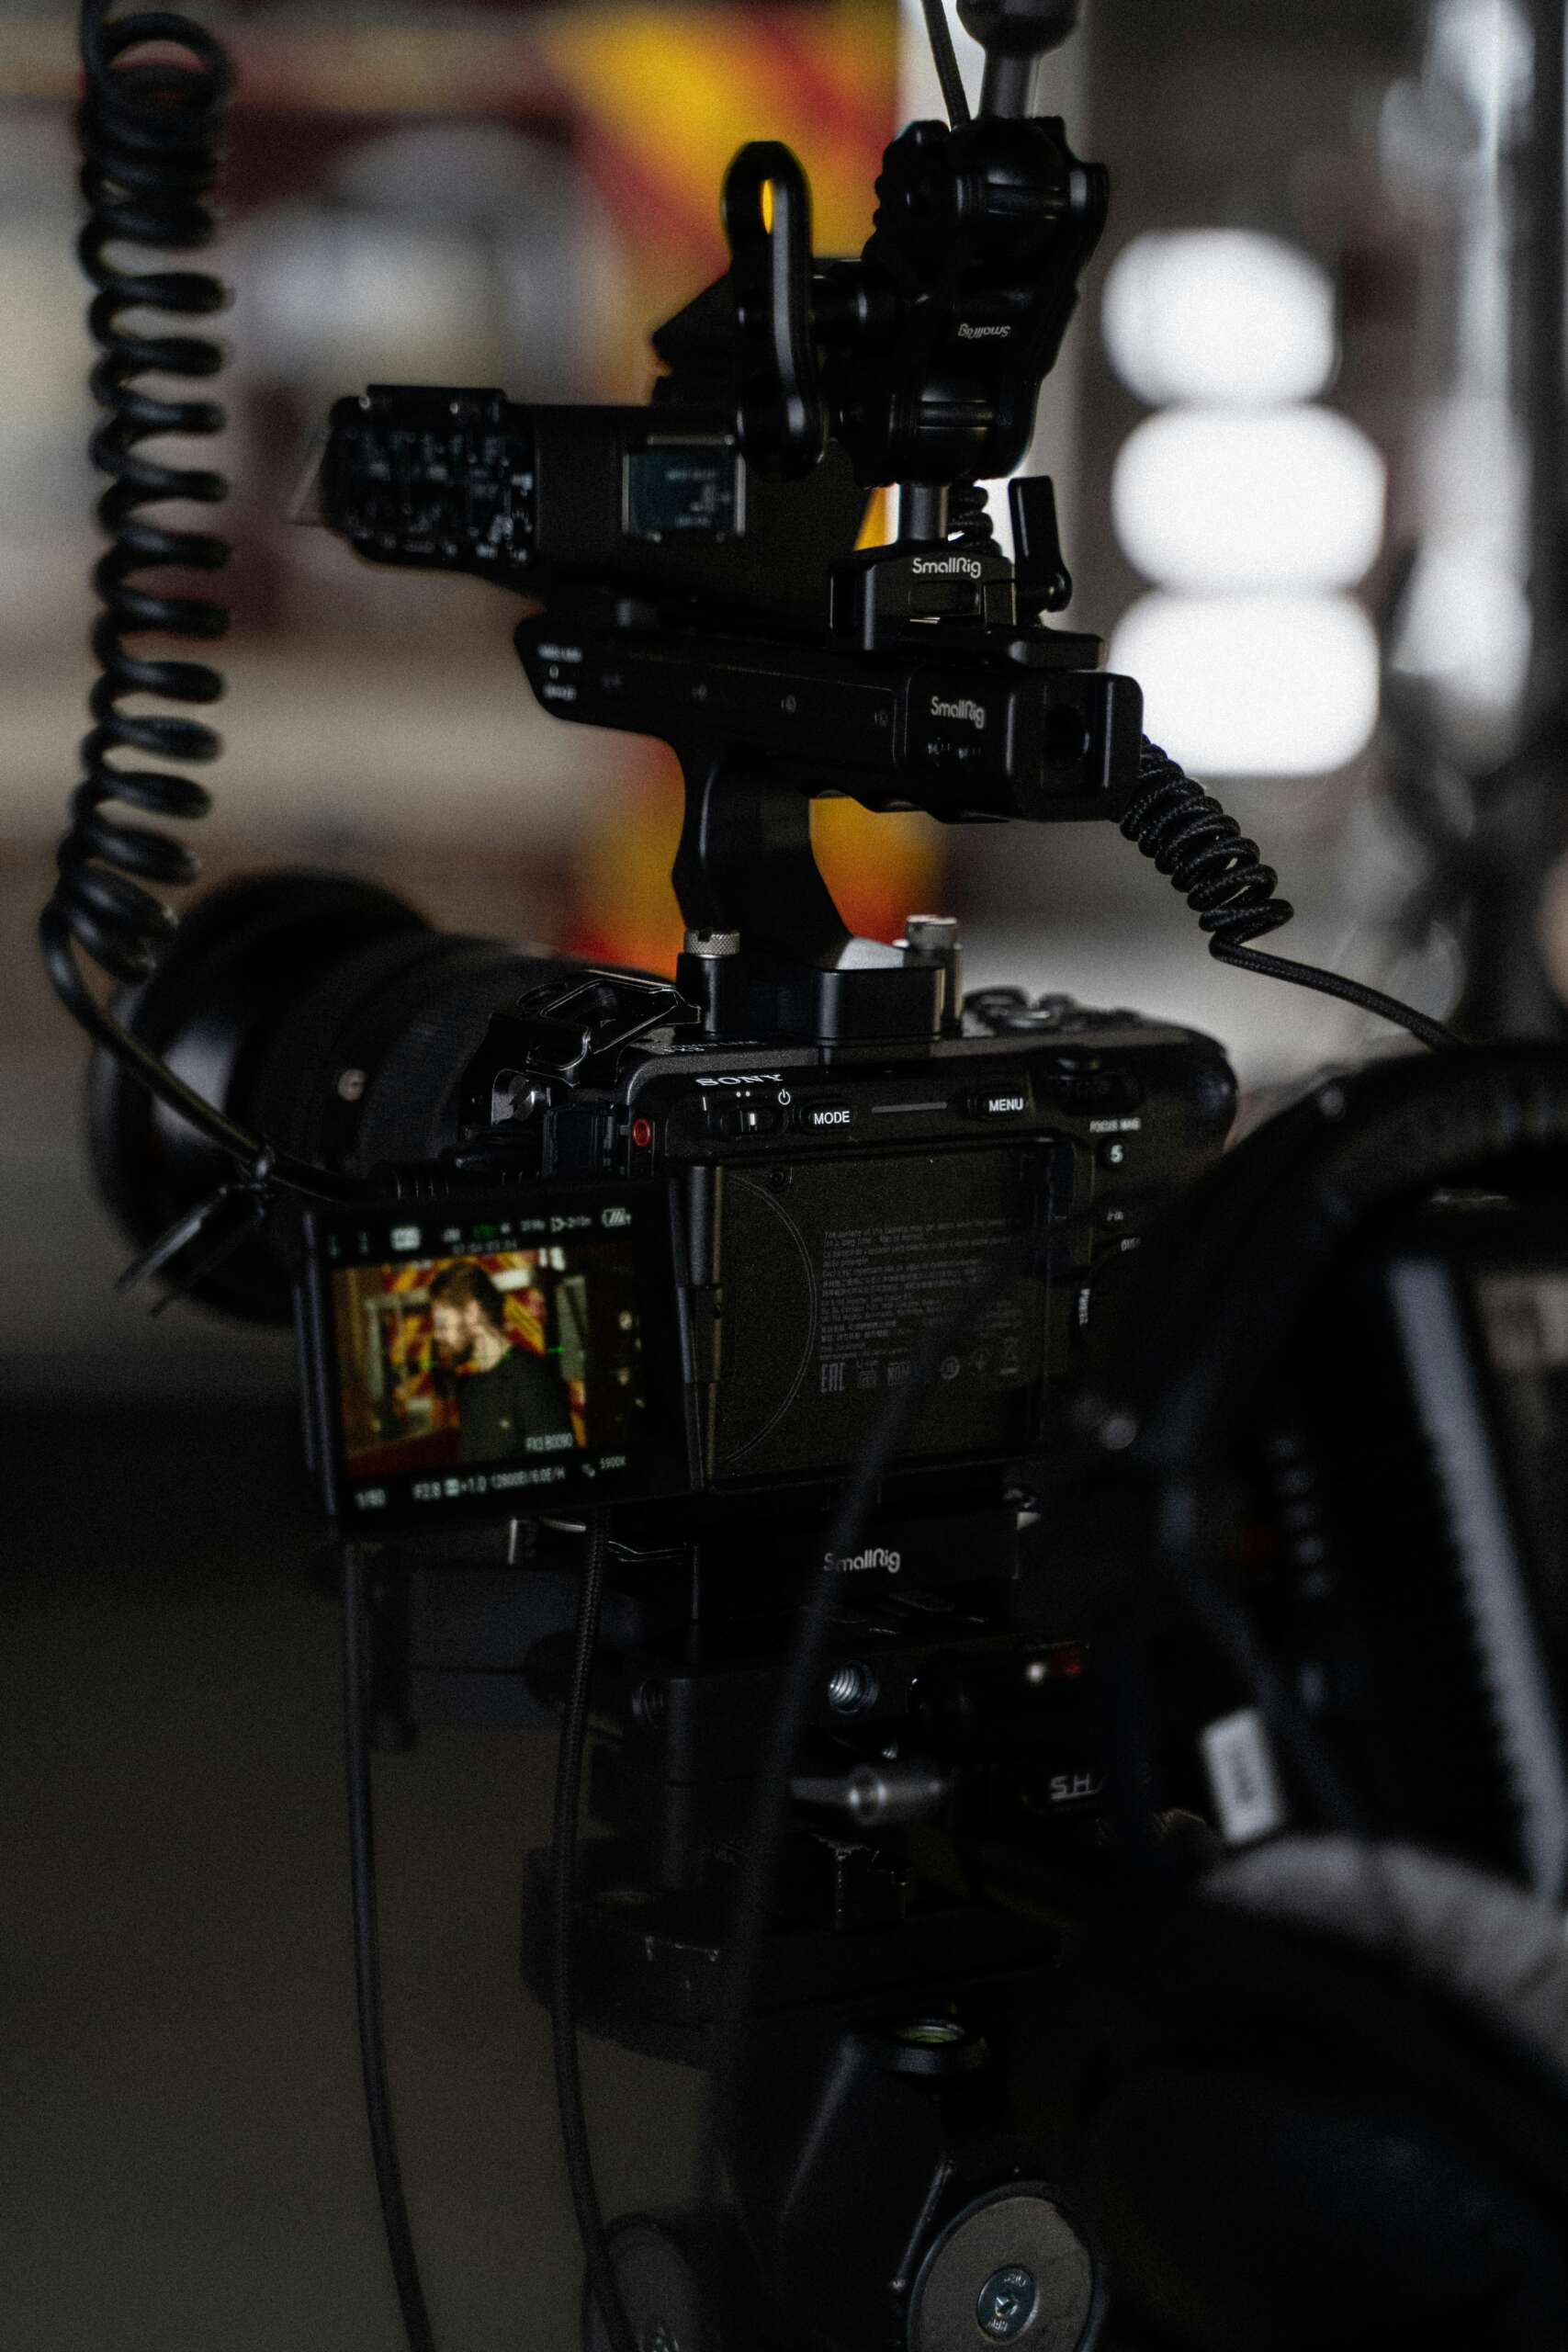
Step 1: Attach the Sony FX3 Body
Start with the foundation—your Sony FX3 body. This compact yet powerful camera is the heart of the setup, known for its exceptional video capabilities and versatile design.
Step 2: Connect the Default Handle
Next, attach the default handle that comes with the Sony FX3. This handle not only improves grip and handling but also provides essential audio inputs, making it an indispensable part of the setup.
Step 3: Mount the Rode VideoMic Pro Plus
Good audio is just as important as good visuals. Secure the Rode VideoMic Pro Plus onto the handle’s cold shoe mount. This microphone is ideal for capturing clear, directional audio, reducing unwanted background noise and ensuring your sound quality matches the high standard of your visuals.
Step 4: Attach the G-Master 2 16-35 mm Lens
Now, it’s time to focus on your visuals. Attach the G-Master 2 16-35 mm lens to the Sony FX3. This lens offers outstanding sharpness and flexibility, perfect for capturing everything from wide-angle landscapes to detailed close-ups.
Step 5: Set Up the Atomos Shinobi 7-inch Monitor
For better visibility and monitoring, connect the Atomos Shinobi 7-inch monitor. Use an HDMI cable to take the HDMI out from the FX3 and plug it into the Shinobi’s HDMI input. This monitor provides a bright, high-resolution display, making it easier to frame shots and check focus accurately.
Step 6: Power the Setup with a V-Mount Battery
Long shoots require reliable power. Attach a V-mount battery to power both the Sony FX3 and the Atomos monitor. The monitor can be powered in two ways: directly using a battery or through the V-mount with a D-tap to DC cable. This ensures your setup runs smoothly without interruptions.
Step 7: Add the Nisi C5 Filmmakers Kit
To enhance your control over light and exposure, set up the Nisi C5 Filmmakers Kit. Attach the matte box to the front of the G-Master lens, and insert the appropriate filters. This kit is essential for managing difficult lighting conditions and achieving a cinematic look right in-camera.
Step 8: Connect to an External Director Monitor
Finally, to provide the director with a real-time view of the footage, use the Hollyland Pyro H to wirelessly transmit the signal from the FX3 to a 28-inch director monitor. This allows the director to review the footage without being tethered to the camera, offering more flexibility on set.
Watch the Setup in Action
For a closer look at how we brought this setup to life, check out the 53-second video below. It captures the entire process, from attaching the body and handle to mounting the Rode VideoMic Pro Plus, lens, monitor, and more. You’ll see how each component works together to create a versatile, professional-grade rig.
Conclusion
By following these steps, you’ll transform your Sony FX3 into a filmmaking powerhouse, ready to tackle any project with precision and creativity. Whether you’re capturing landscapes or shooting complex scenes, this setup ensures you’re equipped for success.